Video transcript
In this video, you'll learn how to get started in Better Cater: set up your business, add your catalog, and build your first event and its proposal.
Most caterers are trying to manage events across spreadsheets, old proposals, scattered notes, and manual PDFs.
Better Cater is built around one simple idea: build the event once, and use those same details for your proposal, invoice, kitchen sheet, shopping list, and profit tracking.
Here's where you'll be by the end of this video: a polished proposal from your own account, with your logo, client details, menu, pricing, totals, and terms all in one place.
The path there is three steps: your business, your catalog, your first event.
Your account is not empty.
It opens with a small example catering company in it, so you can see how the pieces connect before you replace them with your own.
Before you build your first real event, take a few minutes to check the settings that appear on your proposals and invoices: your business information, logo, service charge, gratuity, tax settings, and contract terms.
You enter them once, and Better Cater uses them on every event after that.
Start with the logo, because it is the first thing a client sees on a proposal.
Service charge and gratuity are the percentages added to every new event, tax settings hold your rate and what it applies to, and a contract template is the terms that print on your proposals.
The examples are placeholders, so set each one to what you charge.
Step two is your catalog, everything you sell, priced once.
Menu Items opens on a few example dishes.
Open one and you'll see what an item carries: its group, its tax category, the price you charge, and either a cost you type or a linked recipe that costs it from the ingredients.
Edit these into your own dishes, or add new ones.
If entering your menu is the part you've been putting off, send it to support at bettercater dot com.
We can help get your items and prices set up inside your account.
Packages, staff roles, and rental items sit under the same Catalog menu and work the same way: a priced bundle, an hourly or flat rate, a rental with its price and cost.
Step three is your first event.
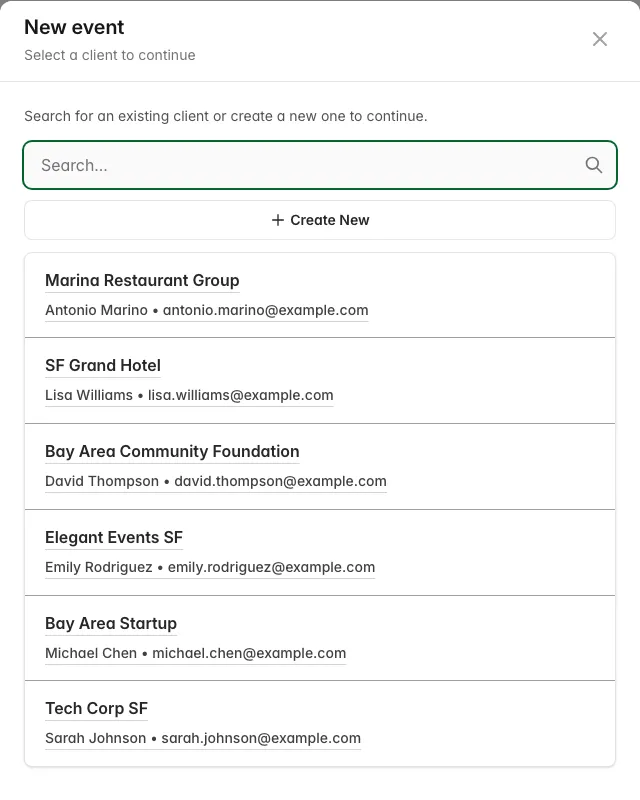
Events, then New event.
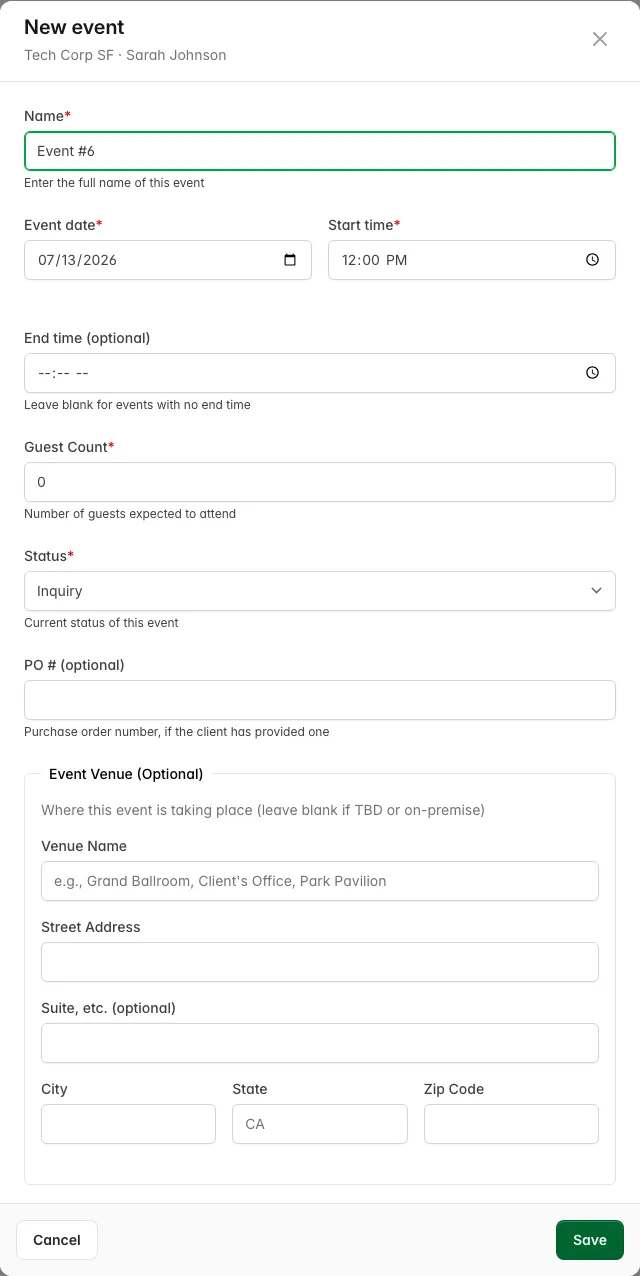
Pick the client, or add one right there, then the name, the date, the guest count, and the status, which starts at Inquiry and moves as the client commits.
On the Menu tab, pick a dish and answer one question: per person, or a set amount.
Per person multiplies by the guest count, so forty guests is forty salads, and when the guest count changes, the line changes with it.
A set amount stays at the number you typed, like two sheet cakes, no matter how many guests come.
Staff and rentals come from the catalog the same way.
On the Staff tab, two servers for four hours, at the hourly rate from your catalog.
On Rentals, forty chairs, with the price and cost you set in step two.
Event Totals on the right adds up as you go: menu, rentals, staff, then the service charge and tax you set in step one, down to the total.
And here is your first proposal, from the event you just built: your logo, your dishes, your prices, your terms.
The same event later becomes the invoice, the kitchen sheet, and the shopping list, so no one is retyping the same details in five different places.
That's the fastest way to get started in Better Cater: set up your business once, add your catalog once, and build your first event from there.
Start by replacing the example details with your own logo, menu items, and prices.
Then create one real event and preview your first proposal.