
What it does. Your catalog holds everything you sell: the dishes and drinks, plus the rentals and staff you bill for. Build it once and pull items into any event instead of retyping them.
When you’d use it. Your first week, getting what you sell into Better Cater so events and proposals come together fast.
Start with item groups
Item groups are the headings your menu is sorted under, like Appetizers, Entrees, Sides, Desserts, and Beverages. They keep your catalog tidy, and they set the order items appear in.
- Click your profile icon in the top right, then click Settings.
- Click Item Groups in the left sidebar.
- Click Add Item Group.
- Enter the name, like “Appetizers”.
- Click Add.
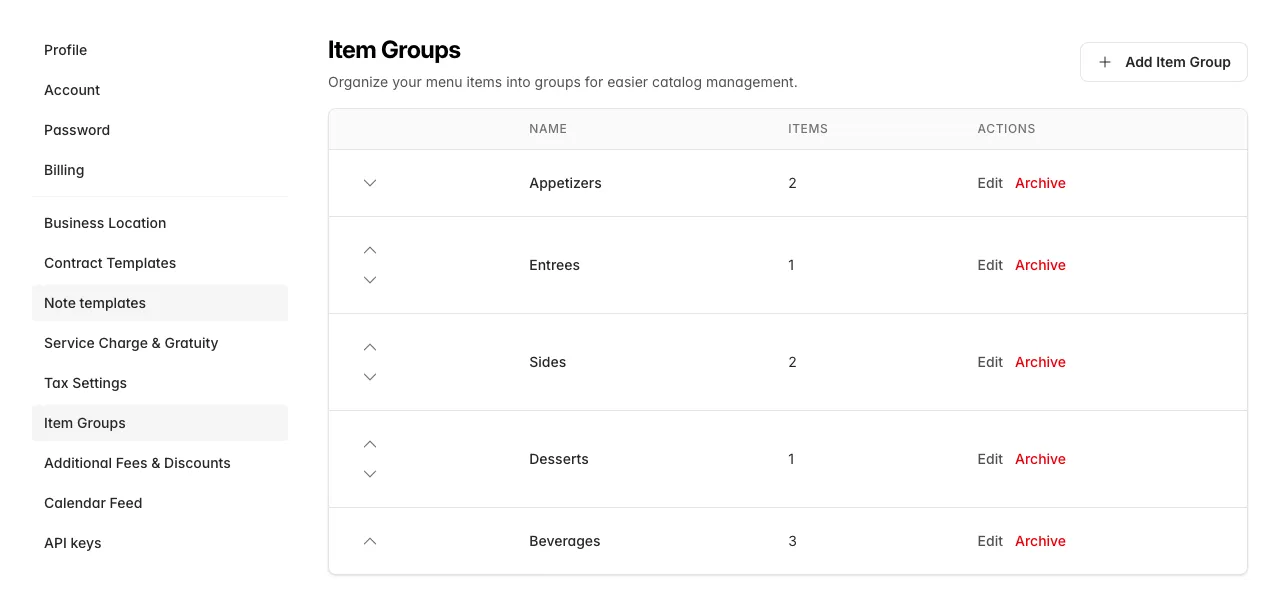
Use the arrows on the left of each row to move a group up or down. That order is the order your items show up in.
Add your menu items
- In the top menu, open Catalog and choose Menu Items.
- Click New Menu Item.
- Enter the Name.
- Pick the Item Group it belongs to.
- Pick the Tax Category: Food, Non-Alcoholic Beverages, or Alcohol. This is what decides how the item gets taxed.
- Under Pricing, enter the Price you charge. Enter the Cost too if you want to track your margin, or link a recipe to pull cost from ingredients.
- Click Create Menu Item.
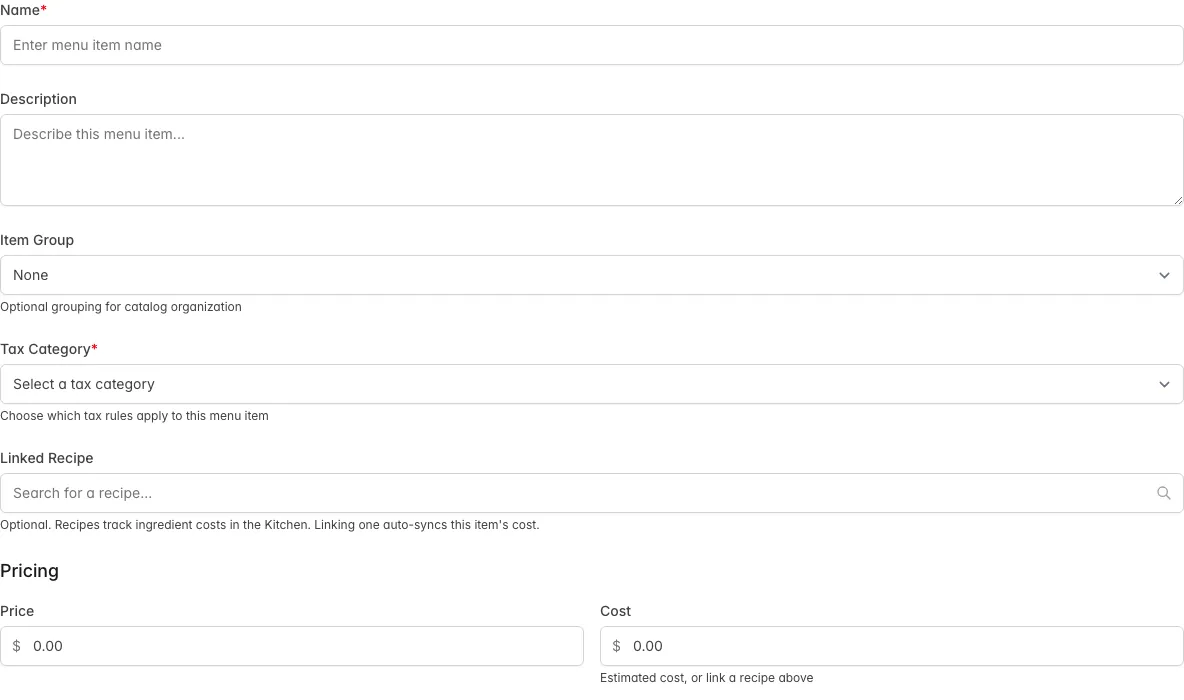
Repeat until everything you sell is in the list. You can always come back and add more. The optional fields, like purchase units and automatic charges, are covered in Add a menu item.
The rest of your catalog
The Catalog menu holds three more lists that work the same way:
- Rental Items for tables, linens, chafing dishes, anything you rent out.
- Staff for the roles you bill, like server, bartender, or chef.
- Packages for a set of items you sell together, like a BBQ package. Build the package once and add it to an event in one line.
What you’ll see. Your items appear in the Menu Items list, grouped under their item groups. From then on you add them to an event from its Menu tab instead of typing them in again.