
What it does. Taxes tell Better Cater how much tax to add to an event, and which parts of the event get taxed. Food can be taxed at one rate, alcohol can carry an extra surcharge, and labor can be left alone.
When you’d use it. Your first week, to change the starter rate to the one you actually charge. Later, when you add a liquor surcharge, or start serving a county with a different rate.
How taxes work
Three pieces fit together:
- Tax rates are the percentages you charge, like Sales Tax at 5%. Each rate lists the item types it applies to.
- Tax categories are the item types: Food, Alcohol, Non-Alcoholic Beverages, Equipment & Rentals, Staffing & Labor, and a few more. Every item in your catalog carries one, so a rate only taxes the categories it’s checked for.
- Service zones group the rates you charge in one area. Each event uses one zone, and that’s what decides its taxes.
Your account already comes with a Sales Tax rate at 5%, a Default Tax Zone that uses it, and the standard categories. Most caterers only need to change that 5% to their own rate.
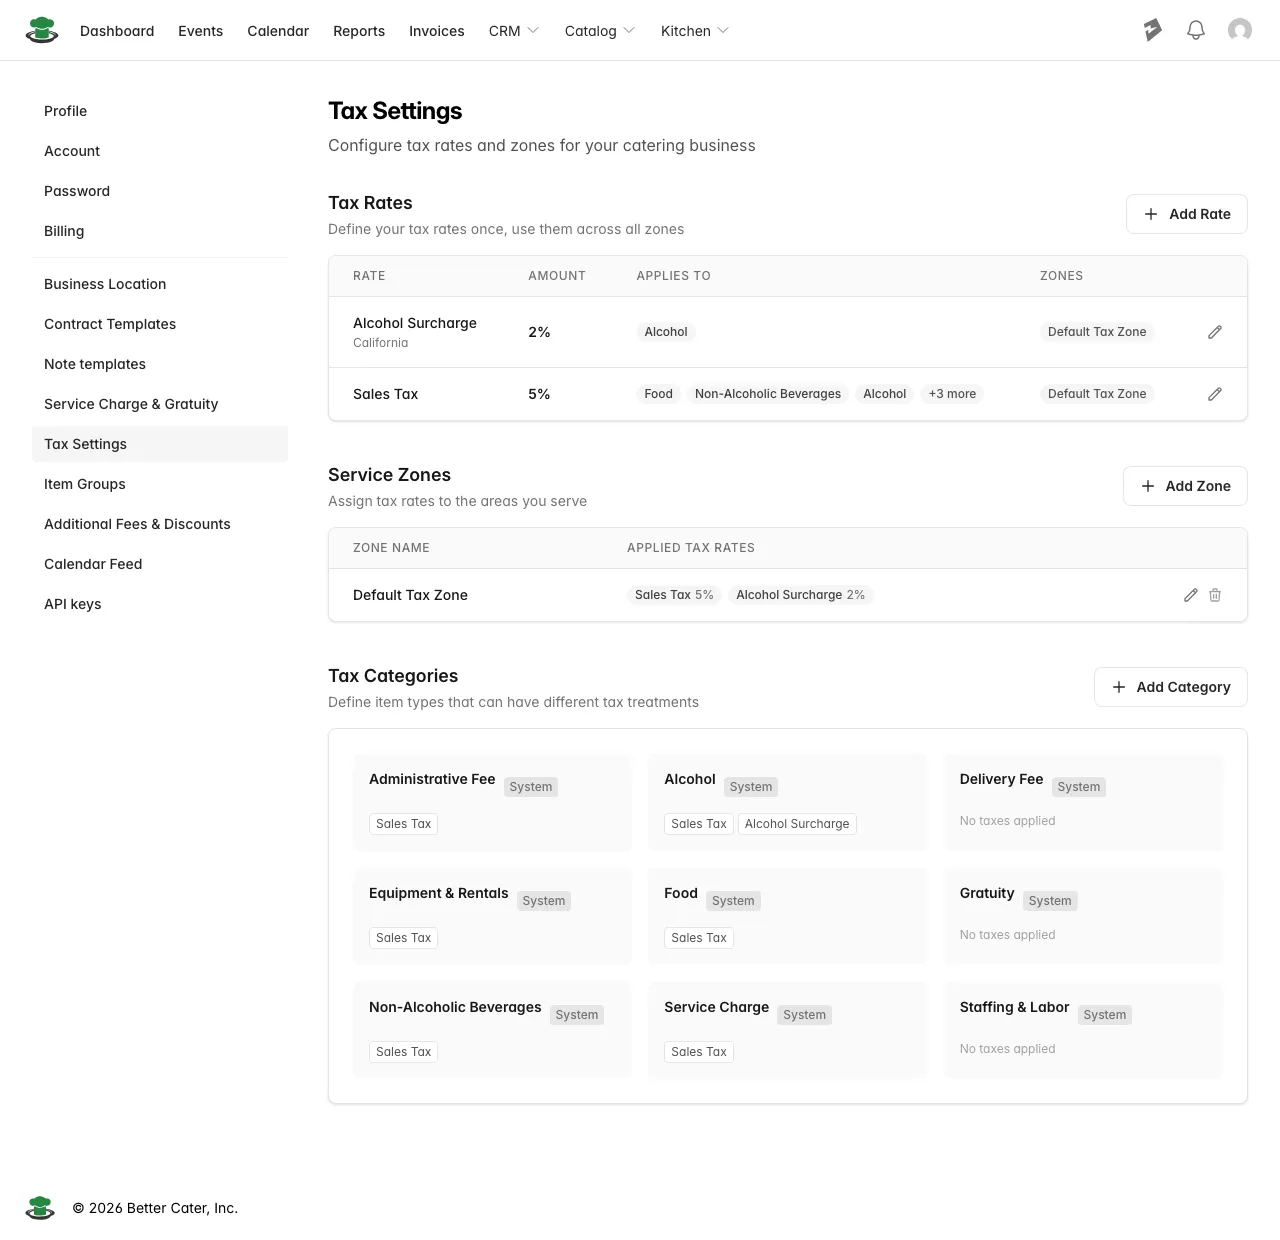
Change your tax rate
- Click your profile icon in the top right, then click Settings.
- Click Tax Settings in the left sidebar.
- In the Tax Rates section, click the pencil icon on the rate you want to change.
- Enter your rate in the Rate field.
- Click Update Tax.
Once a rate has been used on an event, it locks. You’ll see a “Tax Rate Locked” notice, and only the categories stay editable. To charge a different percentage from then on, add a new rate and put it in your zone in place of the old one. Events you already booked keep the rate they were booked with.
Add a tax rate
- Go to Settings, then Tax Settings.
- Click Add Rate.
- Enter the name, like “Alcohol Surcharge”.
- Enter the Jurisdiction if you want it on the rate, like California. This is optional.
- Under Tax Categories, check every item type this rate should tax.
- Under Initial Tax Rate, enter the percentage. Type 8.5 for 8.5%.
- Set Effective From to the date the rate starts. Leave Effective To blank unless it expires.
- Click Create Tax.
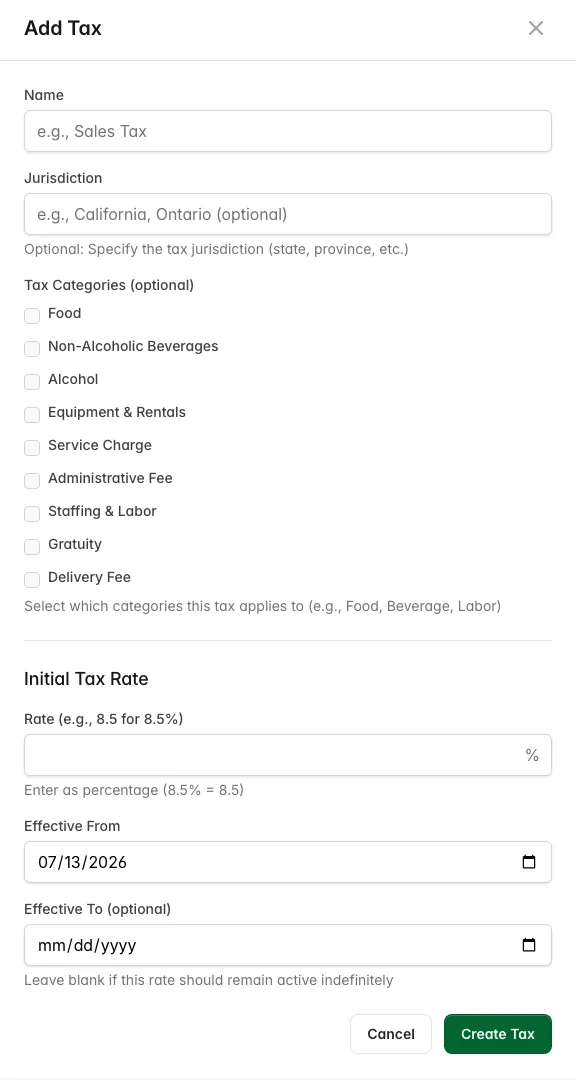
A new rate doesn’t charge anything yet. It starts working once you add it to a service zone.
Put your rates in a service zone
- In Tax Settings, go to the Service Zones section.
- Click the pencil icon on your zone. To cover a new area, click Add Zone and name it, like “Cook County”.
- Under Select Active Rates, check every rate that applies in that zone.
- Click Update Tax Zone, or Create Tax Zone for a new one.
Choose the zone for an event
- Open the event.
- On the Details tab, scroll to the Taxes section.
- Click Edit.
- Pick the zone from Tax zone.
- Click Save.
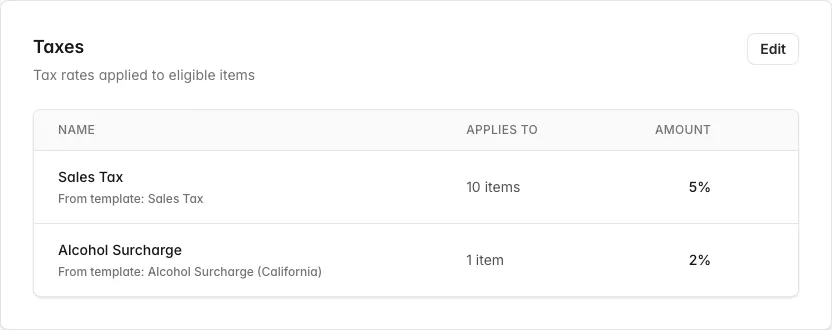
The event’s tax lines rebuild from that zone’s rates as soon as you save.
Make an event tax exempt
- Open the event, go to the Taxes section on the Details tab, and click Edit.
- Check Tax exempt.
- Click Save.
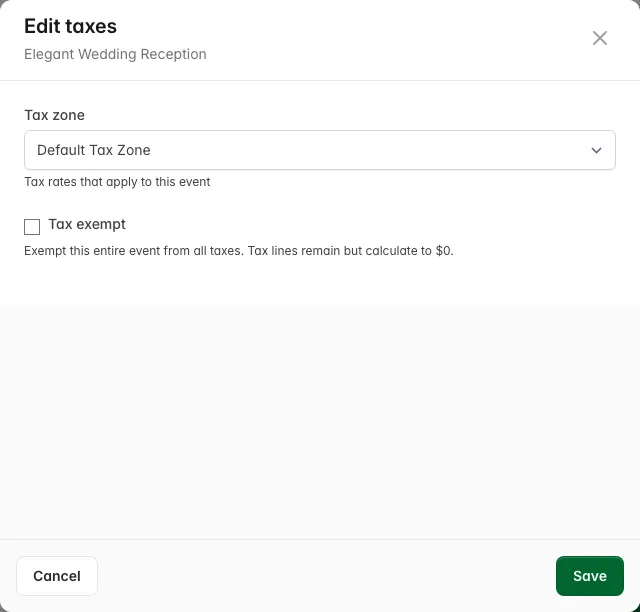
The tax lines stay on the event so the client can see them, but they calculate to $0.
What you’ll see. Each rate shows as its own line in Event Totals, like “Sales Tax (5%) $621.61”, and the same lines carry through to proposals and invoices.
If an item isn’t getting taxed the way you expect, open it in your catalog and check its Tax Category under Tax & Billing. A rate only taxes the categories it’s checked for.