
What it does. Adds rental equipment (tables, chairs, linens) and staff positions (servers, bartenders, coordinators) to an event, priced alongside the menu.
When you’d use it. A wedding needs 9 round tables and 70 chiavari chairs from your rental stock, plus 4 servers for the evening and an event coordinator to run the room.
Add a rental item
- Open the event and go to the Rentals tab.
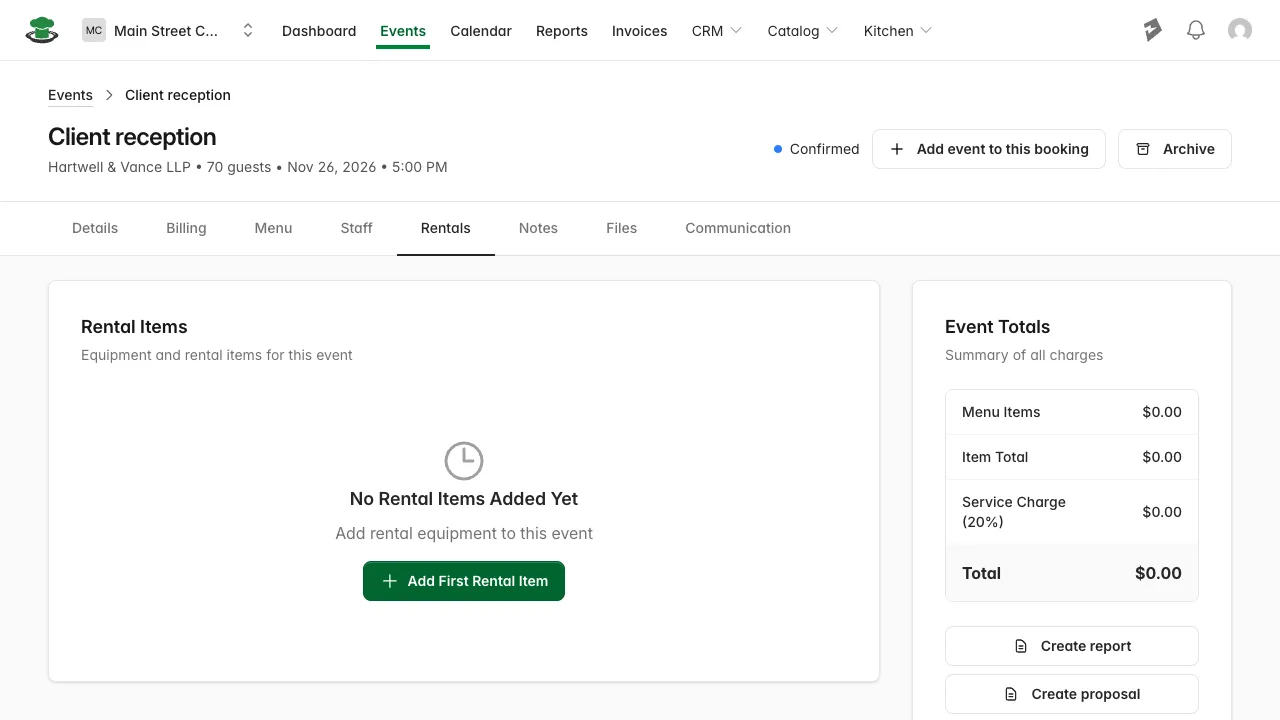
- Click Add First Rental Item (or Add Rental Item if you already have some added).
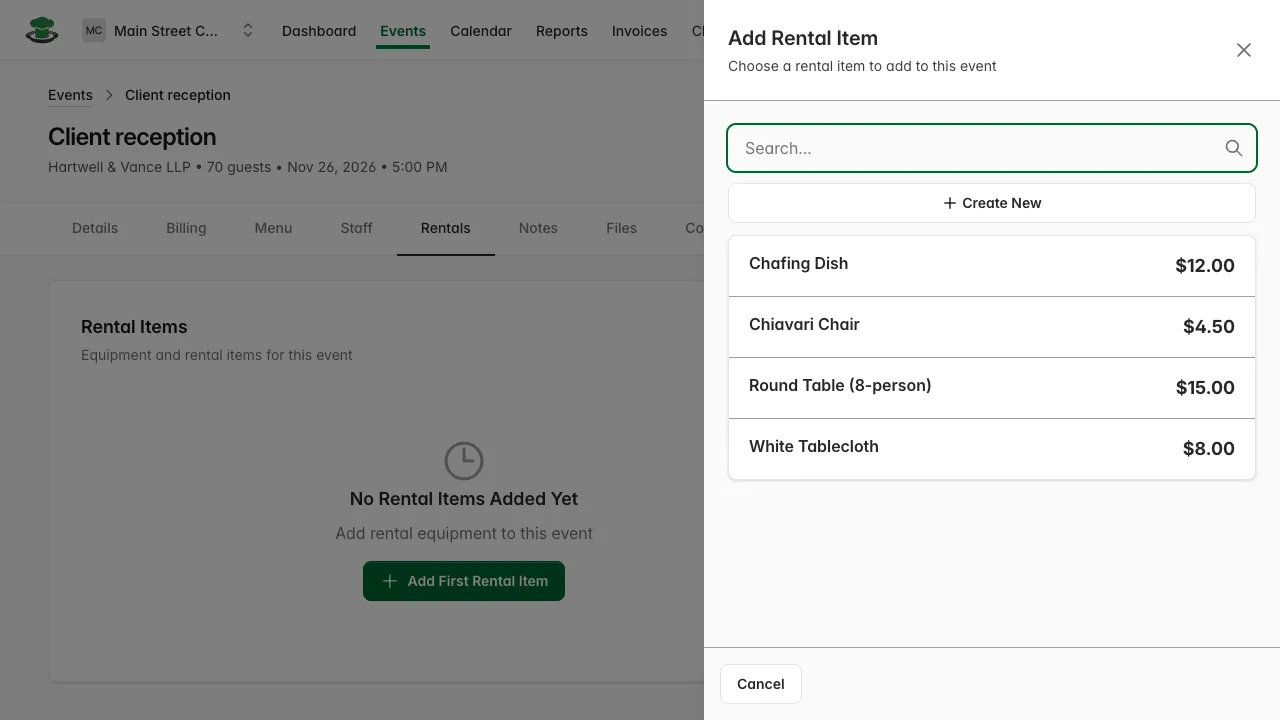
- Pick an item from your catalog, or click Create New to add one on the spot.
- Set the Quantity. Item Name, Description, and Unit Price all come from the catalog item but can be overridden for this event only.
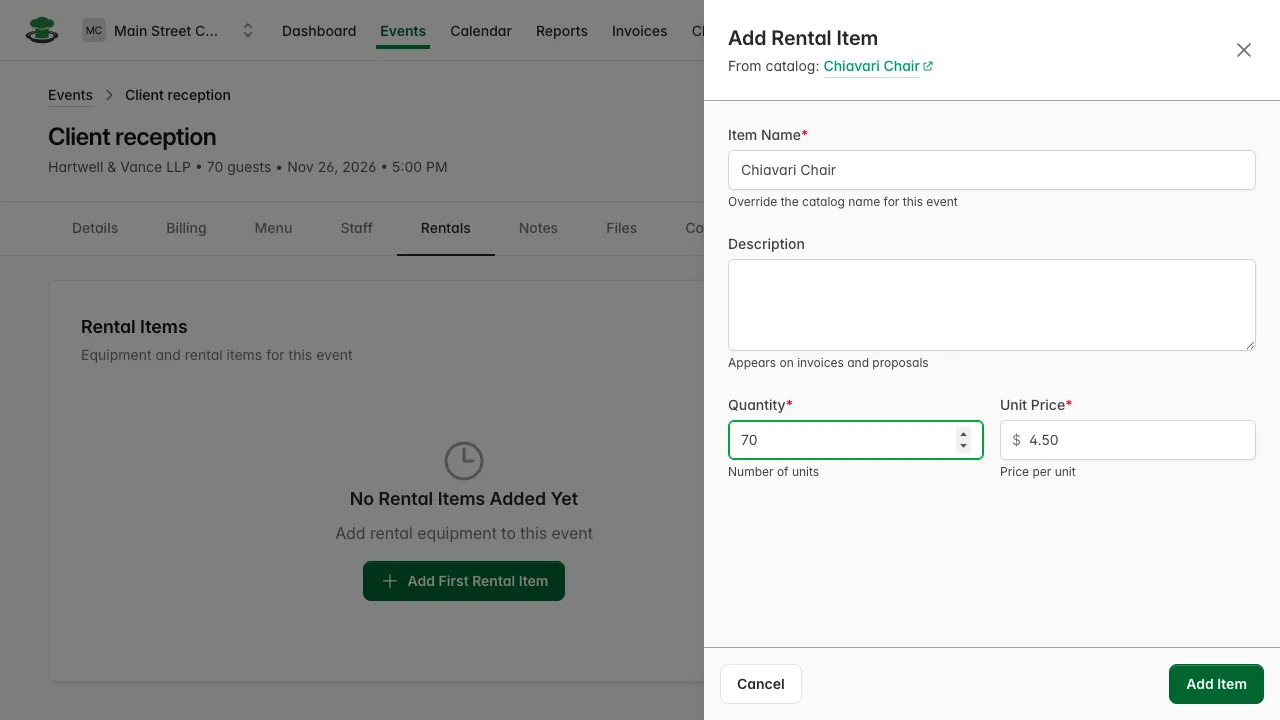
- Click Add Item.
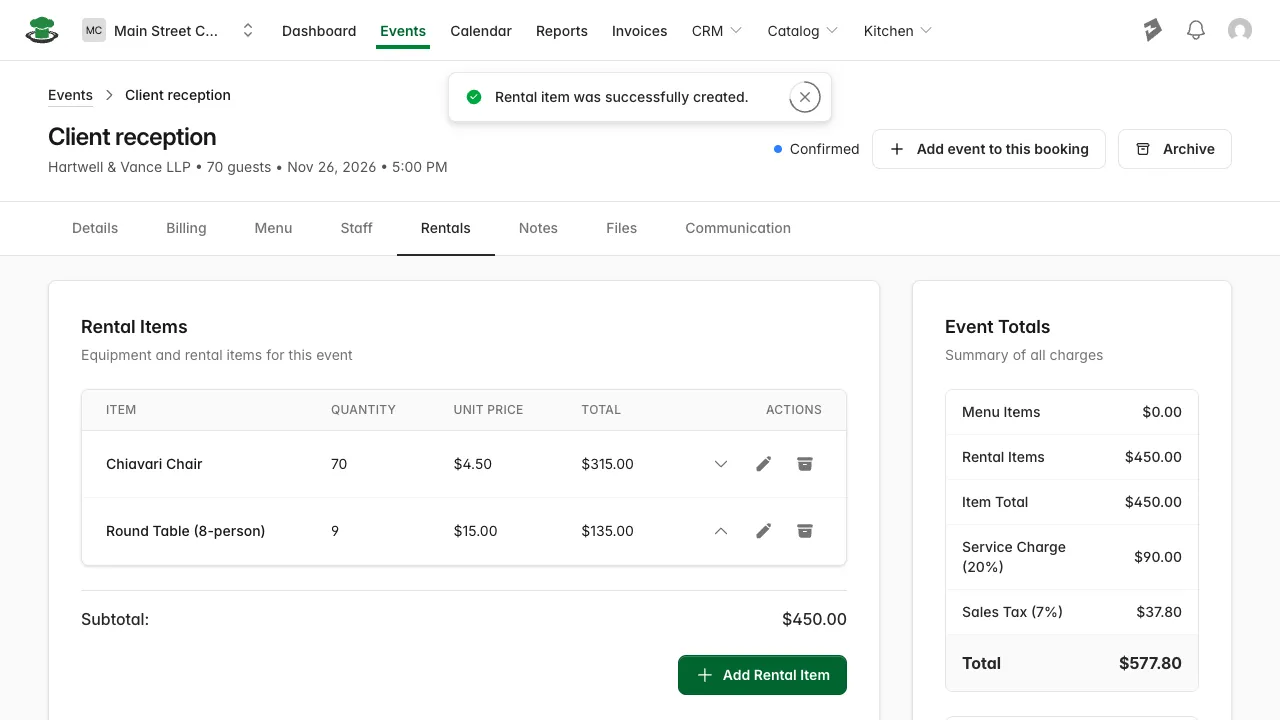
What you’ll see. The item lands in the Rentals table with quantity, unit price, and total (quantity × unit price). Repeat for each rental item you need.
Add a staff role
- On the same event, go to the Staff tab.
- Click Add First Staff Role (or Add Staff Role).
- Pick a role from your catalog. Each one shows whether it’s priced hourly or flat rate.
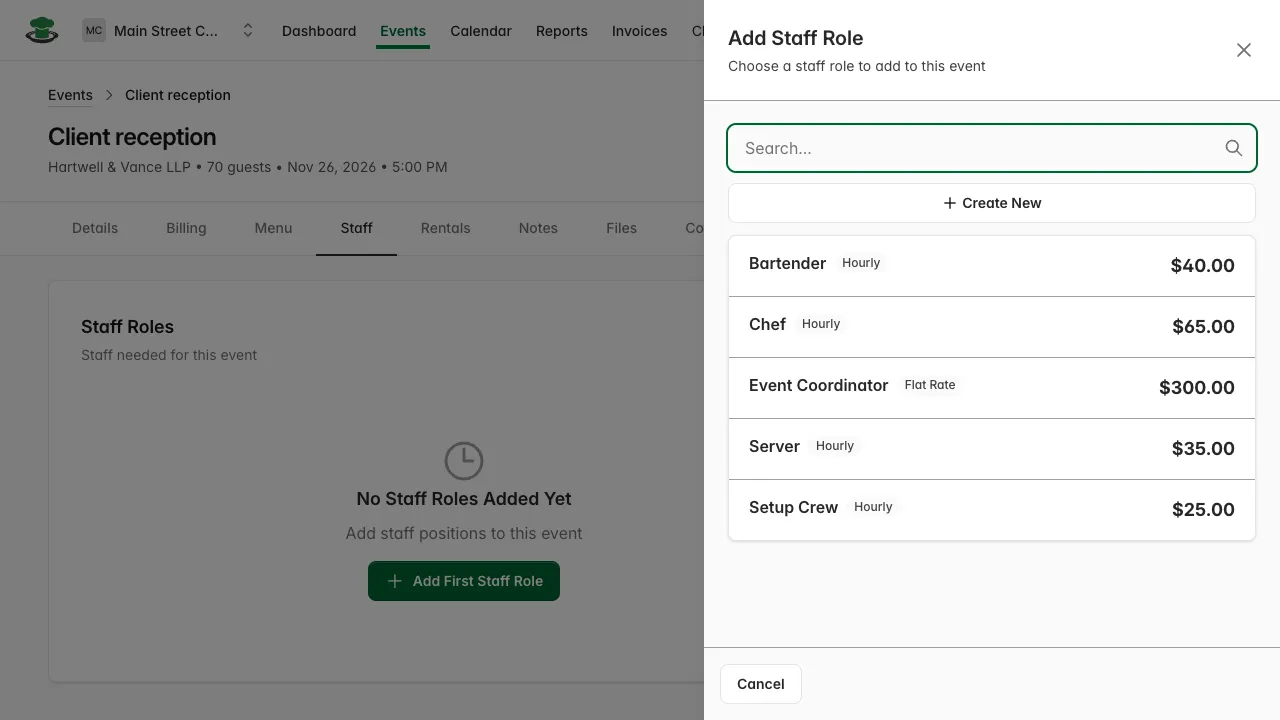
- Set Number of Staff. An hourly role also asks for Hours; a flat-rate role like Event Coordinator doesn’t, since one flat fee covers the whole booking regardless of hours worked.
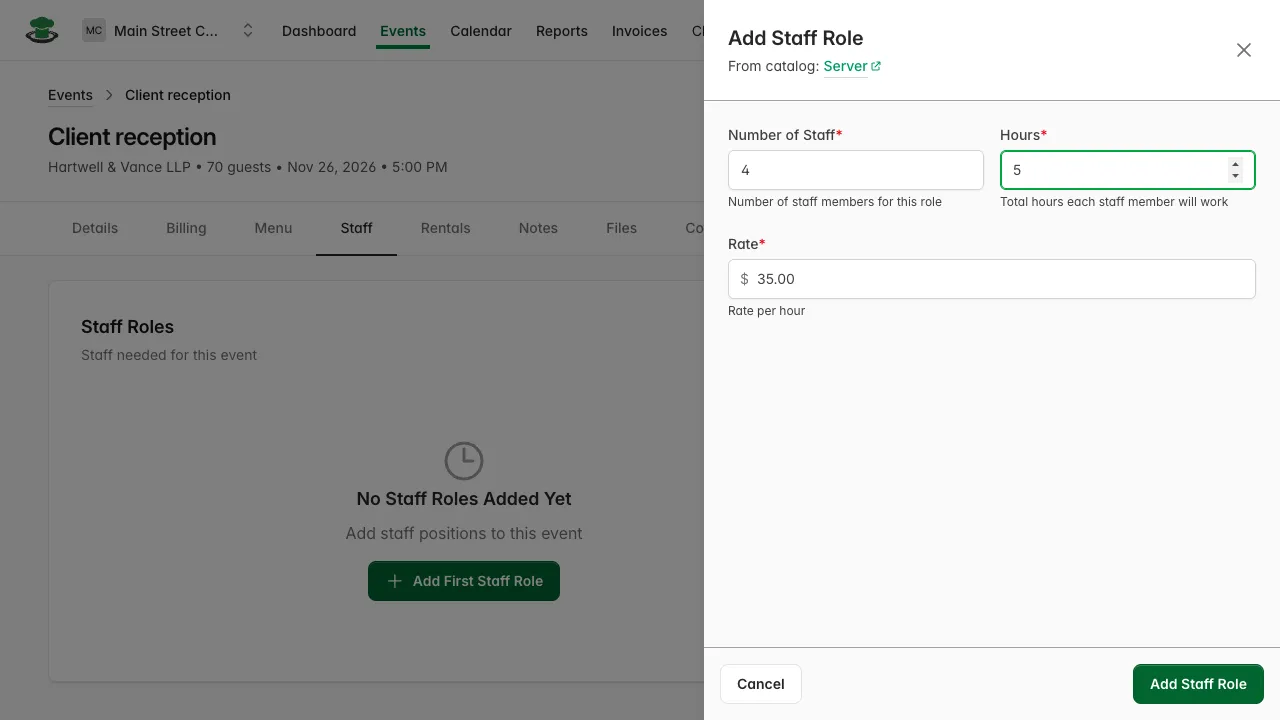
- Click Add Staff Role.
What you’ll see. The role lands in the Staff table. An hourly role’s total is staff count × hours × rate; a flat-rate role’s total is staff count × rate.

Where they show up
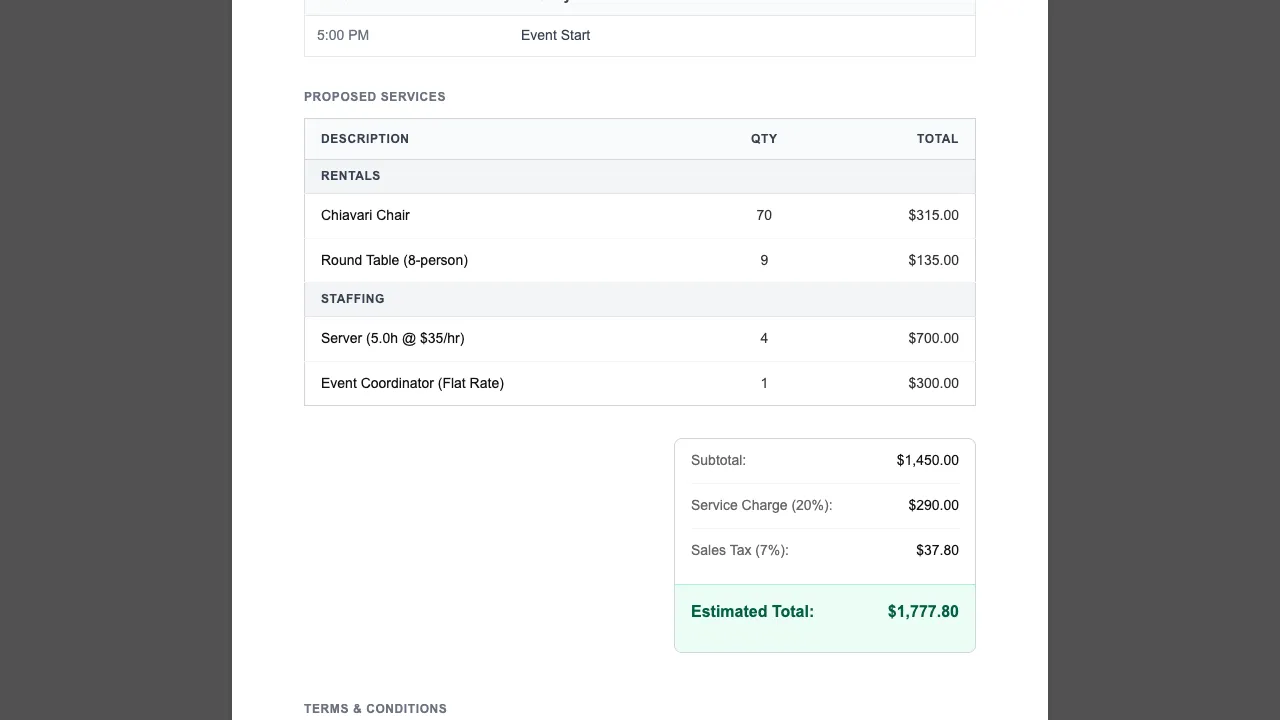
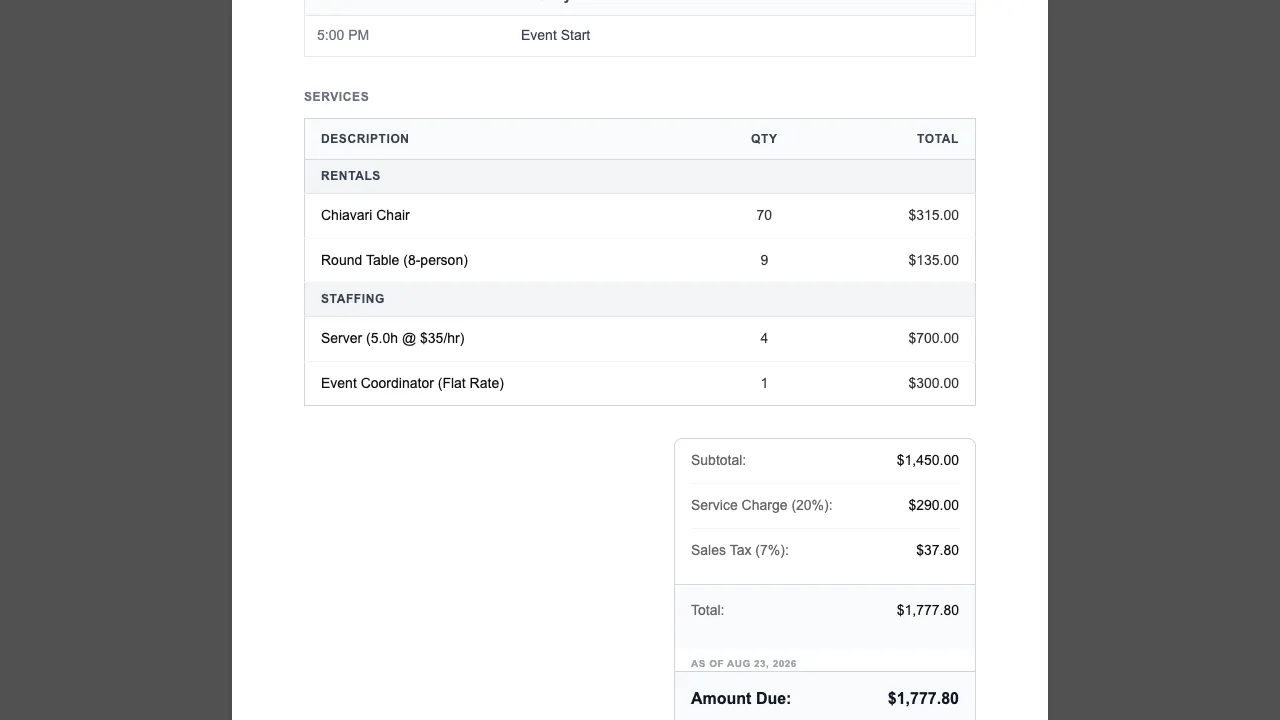
Rentals and staff both flow into Event Totals on the event, and into any proposal or invoice you generate from it. Each document groups them under their own “Rentals” and “Staffing” headings, separate from menu items, with the same quantities and totals you set on the event.
Good to know.
- To set up the roles that show in the staff picker (name, default rate, hourly vs. flat rate), see create a staff role.
- Deleting a rental item or staff role removes it from the event and from any document generated afterward.